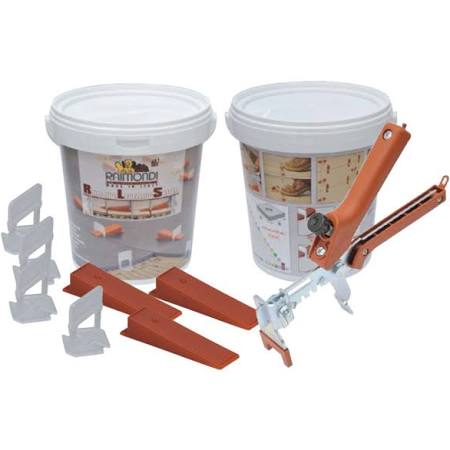
We now stock the Raimondi Tile Leveling System RLS which utilizes leveling clips and wedges using a tool to tighten them. The wedges are reusable and the clips are inexpensive.
The RLS spacers and wedges make most any tile project look professionally installed.
Easy step to follow:
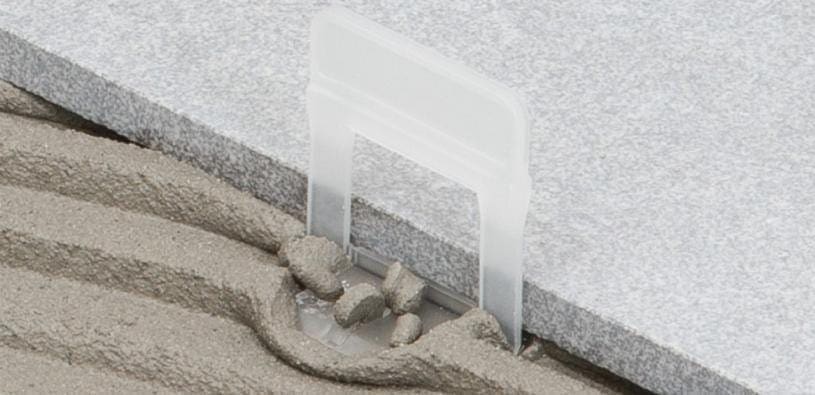
- Install tile as normal but with spacers placed. We recommend using one trowel size larger to accommodate for the spacer being beneath the tile. Apply mortar to the substrate (floor or wall), place spacers and tiles at about the same time. It is very advantageous to place the spacers under the tile BEFORE the tile is in the mortar. Tiles after the first are easy.
- Please the next several tiles as needed. We recommend tiling no further than you can easily reach with the RLS Pliers tool.
- According the Raimondi step 3 is inserting the wedges. IT’S NOT. WAIT! Use a rubber mallet to gently rap the tiles to ensure mortar is actually contacting the tile.
- Now insert wedges and hand tighten. It’s important not to over-tighten either by hand or with the pliers as you can snap the spacer. Don’t do that.
- After your several wedges have been hand tightened you may use the pliers. We recommend loosely tightening the batch and then going around a second time to tighten. This allows the tiles to level consistently and avoids spacers snapping while also keeping mortar bonding underneath.
- Allow to dry for 24 hours (or whatever). Remove spacers and wedges by kicking them off. Two notes – use boots as you can easily hurt your toes and kick parallel to the spacer. AKA, kick perpendicular to the wedge along the grout line. If you kick against the grout line your spacers break off at the top of the grout line, not below. That’s just ugly and causes much more work.
Good luck.
Link : https://www.nstile.com